

Ruffle Shell Bucket Hat- Free Pattern
*DISCLAIMER *
This pattern is the sole property of JusBeeCreations Crochet Designs. This pattern is Copyright protected and cannot be copied or reproduced in any way. You are more than welcome to sell your finished items from this pattern. Please be sure to tag/link/reference JusBeeCreations as the designer. My photos are also Copyright protected and cannot be used to sell your finished items. Enjoyed this pattern? Check out our Etsy Shop for more designs.
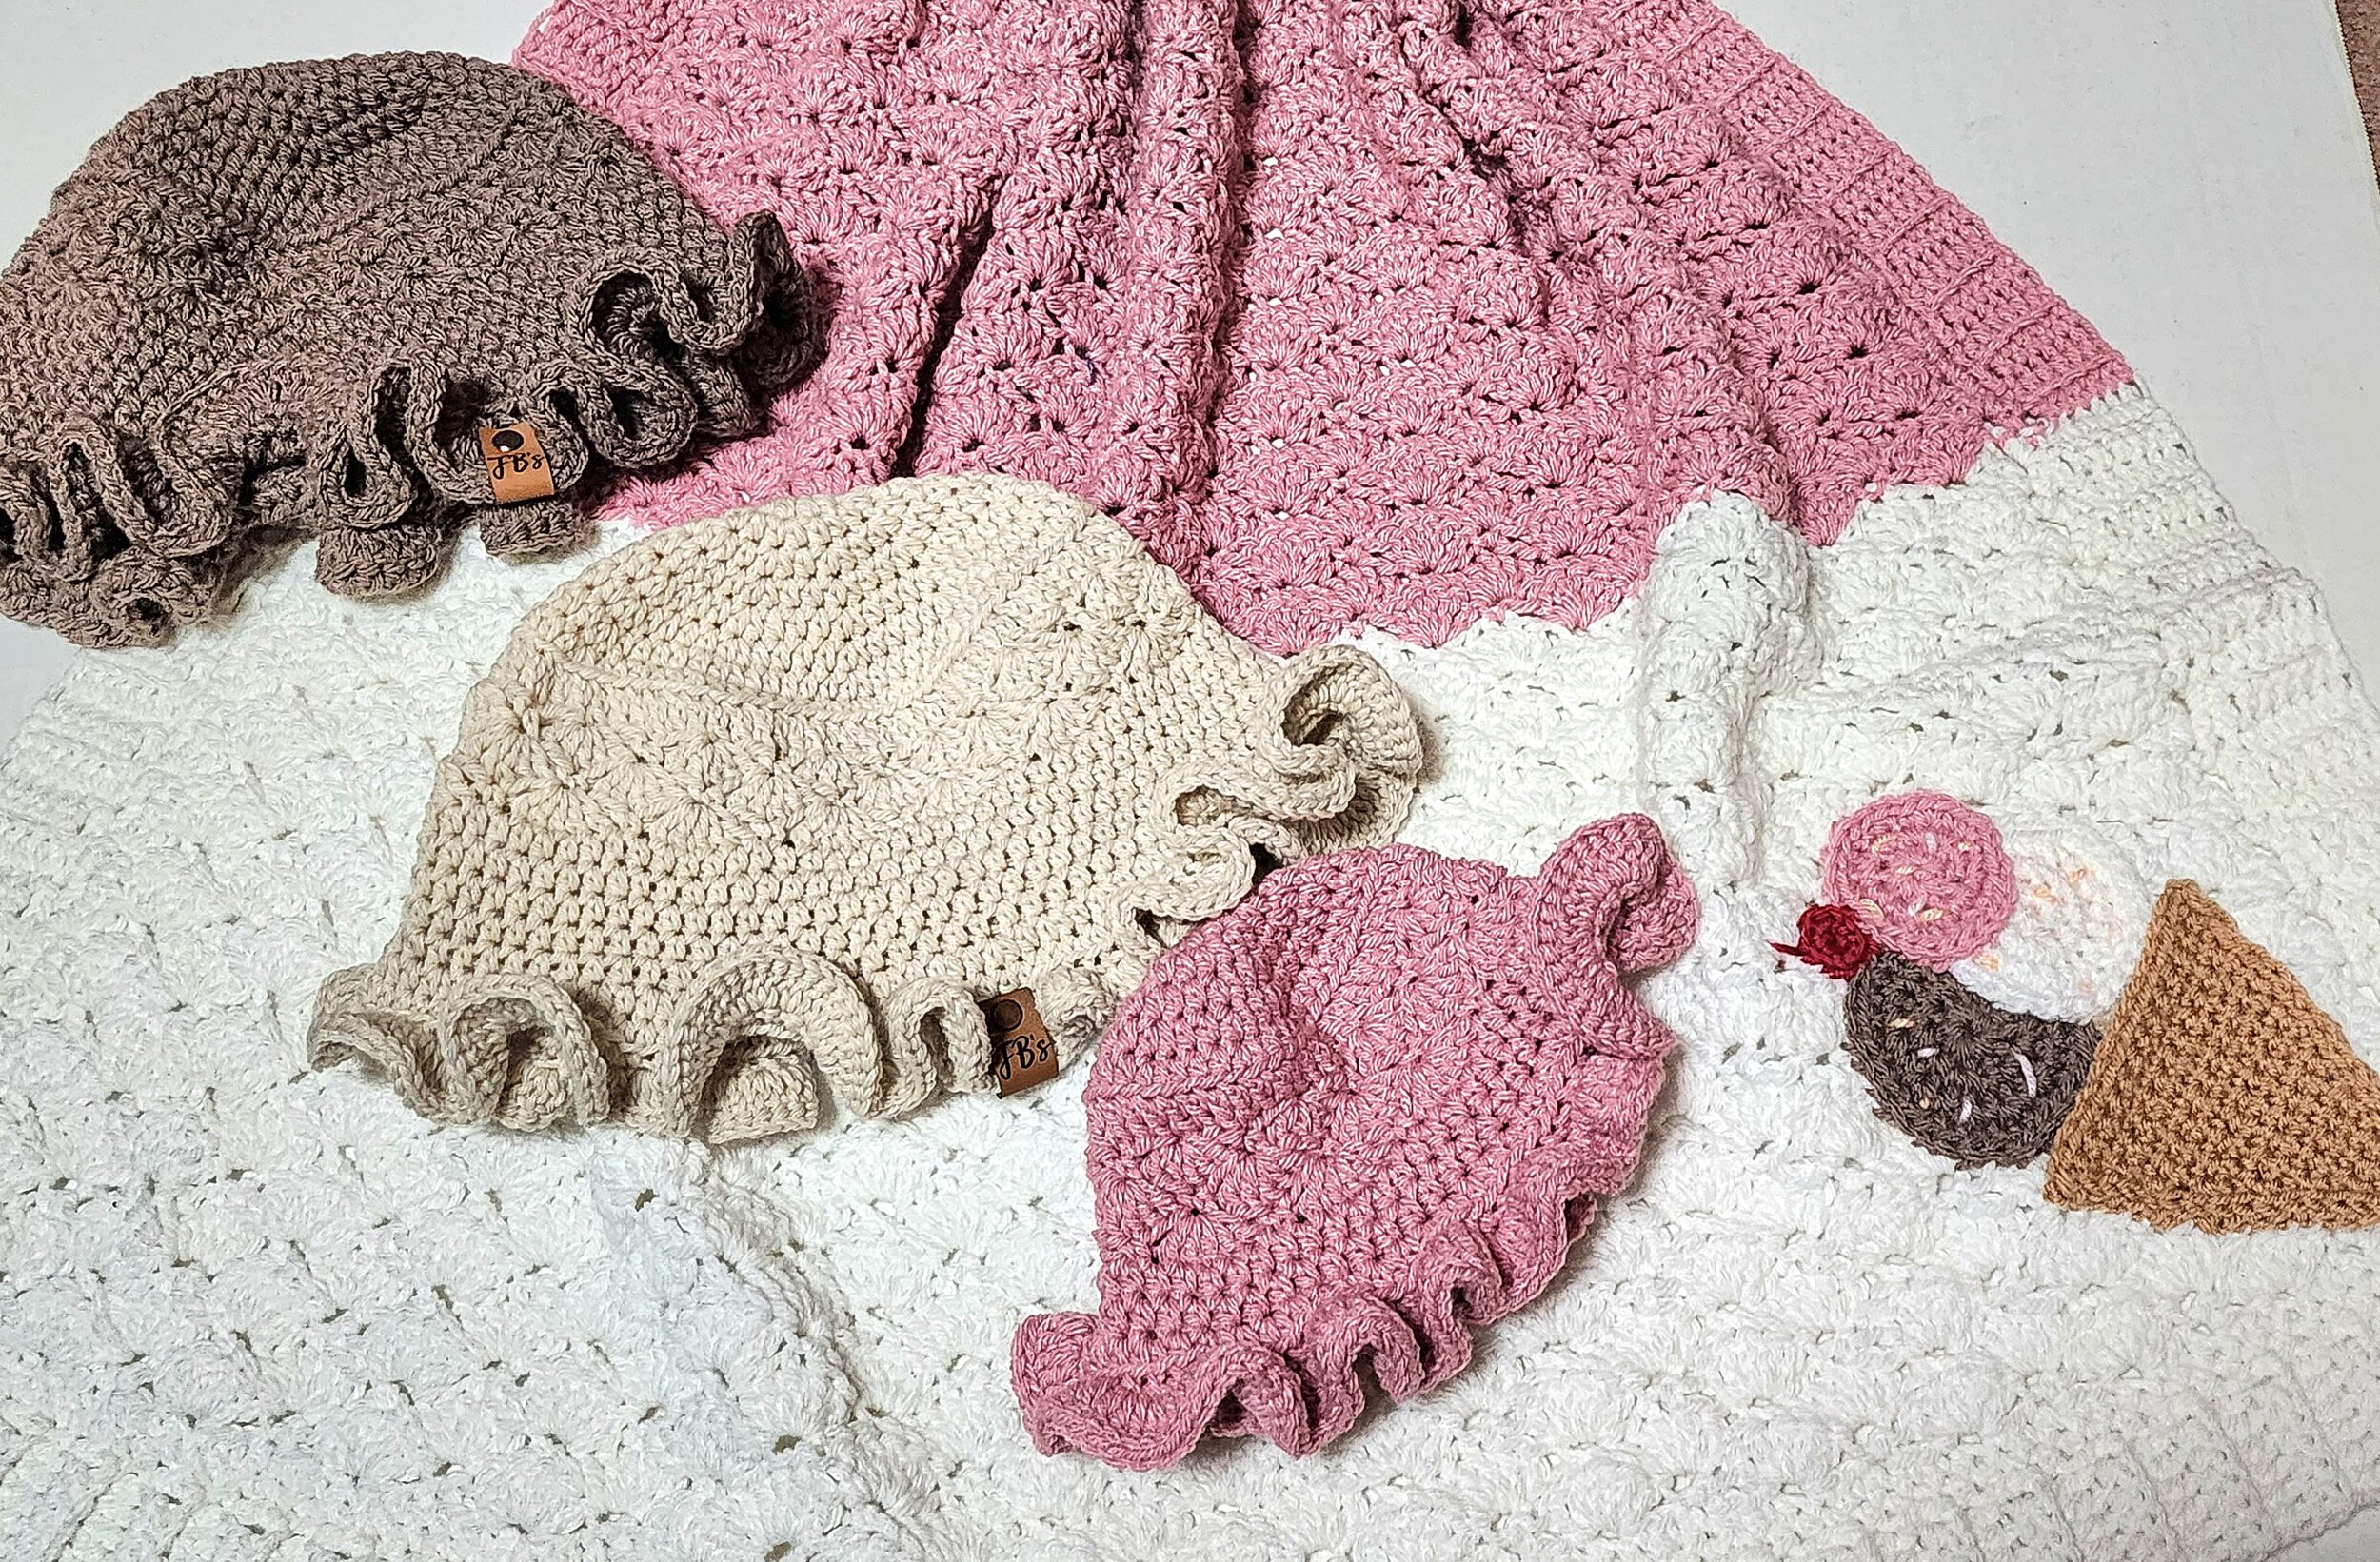
Want a super soft, stylish hat you can rock for any occasion? Look no more! Our Ruffle Shell Bucket Hat, will keep you stylish this summer. The best part about this design is you can wear it year round. This design was inspired by our Neapolitan Bulky Shell Blanket. This hat uses beginner-friendly stitches and works up fairly quickly. The pattern is written in Standard American Terms. English Only. This pattern assumes your an intermediate / advanced beginner. This pattern also includes Baby, Child, and Adult sizes.
Yarn Requirements
Worsted #4 Weight ( 100g/ 180 yrds) Ultra Soft Acrylic Yarn
Colors Shown: (1 skein needed)
Petal Pink, Cottonwood, Warm Brown
Hook Requirements
Polaris Streamline Galaxy, 5.5mm hook
MAterIALS
Seaming Needle
Personalized Garment Tags
Scissors
Measuring Tape
Abbreviations
Dc- Double Crochet
Hdc- Half-DoubleCrochet
Sc- Single Crochet
Sl St- Slip Stitch
Rnd- Round
Inc- Inc
Sk- Skip
St. M- Stitch Marker
Pm- Place Marker
Rep- Repeat
St/Sts- Stitch/ Stitches
Pattern Construction
For this design, the bucket hat is worked from the top down. You will begin with a magic circle, increasing in rounds until you reach your desired size. Each Round is worked continuously, so a st marker is needed to mark the first st of the round. Next, you will work the shell stitch section , shown in the modeled pictures. You will finish off working the body and brim with a beautiful ruffle st pattern. Pattern written with small to large size in parentheses.
Pattern Begins
Note: Each rnd inc by 10sts. If you need to alter your size keep that in mind when making changes to the pattern. This section requires you to work in continuous rnd. Use your st. marker to mark your first st of the rnd. All Sizes start off with the same inc pattern.
Round 1: Make a Magic Circle. Work 10 hdc into the circle. Be sure to mark your first st of the rnd. Pull your magic circle closed.
10 sts.
Round 2: Work 2 hdc in each st around. (mark your first st) 20 sts.
Round 3: Work *1 hdc in the first st, 2 hdc in the next st* Rep from *to* 30 sts.
Round 4: Work 1 hdc in the first st, 1 hdc in the next, 2 hdc into the next st. *1 hdc across 2 sts, 2hdc in the next st.* Rep from *to * 40 sts.
Round 5: Work 1 hdc across the first 3 sts, work 2 hdc in the next st. * 1 hdc in next 3 sts, 2 hdc in the next* Rep from * to * across 50 sts.
Round 6: Work 1 hdc across the first 4 sts, work 2 hdc in the next. *1 hdc in the next 4 sts, 2 hdc in the next.* Rep from * to* across 60 sts. Baby size stop here. Sl st to first hdc to join.
Round 7: Work 1 hdc across the first 5 sts, 2 hdc in the next st. , * 1 hdc across the next 5 sts, 2 hdc in the next.* Rep from *to* 70 sts. Child size stop here. Sl st to the first hdc to join.
Round 8: Work 1 hdc across the first 6 sts, 2 hdc in the next st., *1 hdc across the next 6 sts, 2 hdc in the next* Rep from * to* 80 sts. Adult size stop here. Sl st to the first stitch to join. For a larger size you can continue increasing in this manner.
Hat Body
Shell Stitch Section
Note: For the shell stitch a mul of 6+1 is required. For the baby size hat 60 is the mul add 1 st bringing your st count to 61. For the child size you end with a total of 70 sts in the rnd. Add 3 sts bringing your st count to 73. 72 is the mul plus 1. For the Adult size you end with 80 sts. The mul is 78 plus 1. That leaves you with a total st count of 79 for the Adult size. Instead of inc by a st, like the smaller size hats require simply decrease by 1 st in the Adult size leaving you with a total of 79sts.
*All Sizes *
Rnd 1. Work 1 dc in each st around.(61,73,79) sts.
Rnd 2: Ch 1 (Doesn't count as a st here and throughout the pattern) Work 1 sc into the first st. * sk 2 stitches, work 5 dc into the next st, sk 2 sts, work 1 sc in the next* Rep from * to * across. You should be ending with a sc in the final st. sl st to first st to join. (for a seamless join Rev Sl st.)
Rnd 3: Ch 3, (ch 3 counts as 1 dc here and throughout the pattern) work 2 dc into the the first st. * work 1 sc into the third dc of the shell created in the previous rnd. Work 5 dc into the next sc.* Rep from *to*
until you have 1 st remaing. Work 3 dc
into the final st of the rnd.
Rnd 4: Rep Rnd 2.
Half Double Crochet Section (Body)
Rnd 5- Ch 1, work 1 hdc in each st around. sl st to join. (61,73,79) sts.
Rnds 6-(7,9,11) Rep Rnd 5.
Brim
Rnd 8(10,12) You will work 1 Inc rnd. Begin with Ch 1, 1 hdc in the first st and 2 hdc in the next. For the Adult size work 1 more inc round.
Final Steps
*All Sizes*
Once you complete your brim, work 1 rnd of sc in blo of your final hdc rnd. Sl st to join. Ch 2, work 3 dc in the first st. Work 3 dc in each st around. Sl st to the first dc to join. This creates the beautiful Ruffle design modeled in the photos. Lastly, ch 1 work a sl st in each st around sl st to join and fasten off. Weave in all your ends. You can finish your hat by adding a personalized garment tag!
It all begins with an idea. Maybe you want to launch a business. Maybe you want to turn a hobby into something more. Or maybe you have a creative project to share with the world. Whatever it is, the way you tell your story online can make all the difference.
Don’t worry about sounding professional. Sound like you. There are over 1.5 billion websites out there, but your story is what’s going to separate this one from the rest. If you read the words back and don’t hear your own voice in your head, that’s a good sign you still have more work to do.
Be clear, be confident and don’t overthink it. The beauty of your story is that it’s going to continue to evolve and your site can evolve with it. Your goal should be to make it feel right for right now. Later will take care of itself. It always does.